



Knowing how to insulate an inflatable hot tub for winter helps reduce heat loss, lower energy costs, and keep your spa comfortable in freezing weather. Cold air, wind, and frozen ground pull heat away fast, especially from inflatable tubs with thin walls.
In this guide, we explain why insulation matters, what materials work best, and how to insulate your tub step by step for reliable winter use.
Why You Need to Insulate an Inflatable Hot Tub for Winter
Inflatable hot tubs are designed for convenience, not extreme cold, which is why winter presents unique challenges. Without proper insulation, heat loss increases, energy bills rise, and comfort drops significantly.
Inflatable hot tubs lose heat quickly in cold air because their thin walls provide minimal thermal resistance. Energy costs spike when the heating element runs constantly to compensate, putting strain on both your wallet and the system itself.
Without insulation, water cools too fast between uses, reducing soak time and enjoyment. This is why many owners search for how to insulated SaluSpa hot tub for winter. The same challenges apply to most inflatable spa brands.
Proper winter insulation keeps your spa warmer for longer periods, stabilizes water temperature, and helps extend the lifespan of your inflatable hot tub.
What Materials Work Best for Inflatable Hot Tub Winter Insulation?
Choosing the right materials is the foundation of effective inflatable hot tub winter insulation. Not all insulation products perform equally in cold, wet outdoor environments.
Foam-core and reflective insulation outperform fabric wraps or cheap thermal covers because they address multiple forms of heat loss at once. At Insulation MarketPlace, we rely on proven reflective insulation systems that combine durability with thermal efficiency.
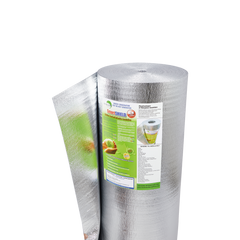
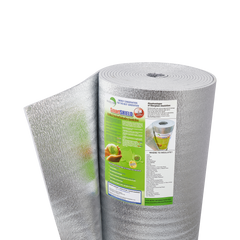
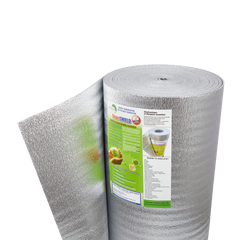
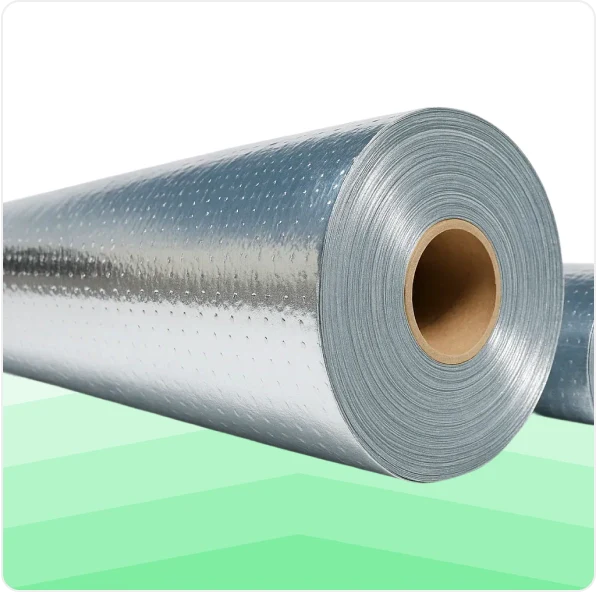
SmartSHIELD reflective insulation
- Foam core adds thermal resistance
- Dual aluminum foil reflects radiant heat
- Reflects up to 97 percent of radiant heat
- Water resistant and mold resistant
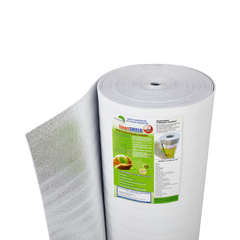
SmartBUBBLE reflective insulation
- Bubble core traps air to slow heat transfer
- Reflective foil improves heat retention
- Lightweight and flexible
- Suitable for seasonal winter use

Both options are water-resistant, mold-resistant, and safe for outdoor use throughout winter.
Unlike absorbent materials, they won’t soak up moisture, freeze, or compress over time. Avoid insulation that retains water or loses thickness, as these materials become ineffective and may even damage your spa setup.
How to Insulate an Inflatable Hot Tub for Winter Step by Step
Understanding how to insulate an inflatable hot tub for winter requires addressing heat loss from the ground, sides, and top of the tub. Each area contributes differently to temperature loss, so a layered approach delivers the best results.
Step 1. Insulate the Base
The ground is one of the largest sources of heat loss, especially when frozen.
Before setting up your inflatable hot tub, place insulation underneath it.
- Lay down a thick foam board or reflective insulation like SmartSHIELD
- Make sure the insulation fully covers the footprint of the tub
- This prevents cold ground temperatures from pulling heat out of the water
For extra support, place a wooden platform or heavy duty rubber mat on top of the insulation. This creates a flat, stable base and protects the insulation from damage.

Step 2. Wrap the Sides with Reflective Insulation
The sides of the hot tub are exposed to cold air and wind, which increases heat loss.
Wrapping the tub with SmartSHIELD reflective insulation helps trap heat inside.
- Measure the circumference of the tub
- Cut reflective insulation to size
- Wrap it snugly around the outer walls
- Secure it with waterproof tape or reusable Velcro straps
This method reflects heat back into the tub while blocking cold air. Using removable fasteners makes it easy to take off when winter ends.

Step 3. Cover the Top Tightly
Heat naturally rises, making the top cover critical for winter performance.
- Place an insulated thermal blanket under the existing spa cover
- Make sure the cover seals tightly around the edges
If the pump or heater is exposed, wrap those components with insulation as well. This helps prevent freezing and improves overall system efficiency.

Where to Place Your Inflatable Hot Tub for Maximum Winter Efficiency
Location plays a major role in how well your insulation performs. Even the best materials work better when paired with smart placement strategies.
By positioning your inflatable hot tub thoughtfully, you reduce exposure to wind, moisture, and extreme cold, making winter insulation more effective and reliable.
- Shelter from Wind Exposure: Place your hot tub near a solid wind barrier such as a house wall, fence, or privacy screen. Wind strips heat rapidly from exposed surfaces, so reducing airflow around the tub helps insulation do its job more effectively.
- Avoid Frozen or Bare Ground: Never place your spa directly on frozen soil or concrete without insulation underneath. Cold ground pulls heat away continuously, increasing energy use and wear on the heating system.
- Use an Enclosure or DIY Lean-To: A spa tent, pergola enclosure, or even a simple DIY lean-to can trap warmer air around the tub. Enclosures reduce wind chill, protect insulation materials, and improve overall winter performance.
- Protect Electrical Components: Ensure cords, plugs, and control panels are shielded from snow and moisture. Elevating connections and using weather-resistant covers reduces the risk of electrical issues during winter operation.
Tips for Ongoing Maintenance and Energy Savings
Insulation is most effective when paired with consistent maintenance habits. Small adjustments throughout the season can lead to noticeable savings and better spa performance.
Regular checks and smart usage patterns help you get the most out of your winter insulation setup while extending the life of your inflatable hot tub.
- Inspect Insulation Regularly: Check insulation layers for moisture buildup, shifting, or gaps. Reseal edges and replace damaged sections to maintain consistent thermal performance.
- Clean and Drain Periodically: Draining and cleaning the tub every 6–8 weeks prevents mineral buildup and improves heating efficiency. Clean water heats faster and places less strain on the system.
- Adjust Temperature Strategically: Lower the water temperature by a few degrees when the tub is not in use. Even small reductions can significantly cut energy consumption without sacrificing comfort.
- Add Extra Layers for Infrequent Use: If you use your spa less often in winter, increase insulation thickness and add extra covers. Heavier insulation minimizes heat loss during long idle periods.
Make Your Hot Tub Winter-Ready with Smart Insulation
At Insulation MarketPlace, we help DIY homeowners and spa owners understand how to insulate a hot tub for winter using proven reflective insulation solutions.
SmartSHIELD and SmartBUBBLE are designed to reduce heat loss, improve energy efficiency, and extend spa usage during colder months without complicated installations. With durable, certified materials and fast nationwide shipping, we make winter insulation practical and accessible.
Browse our insulation products to build a winter-ready setup that keeps your inflatable hot tub warm, efficient, and enjoyable all season long.