How To Insulate An Attic Ladder? Step-by-Step Instruction From an Expert
Many homeowners overlook attic ladders with gaps around the attic access point, which is a significant source of energy waste. Losing heat through your attic ladder can only make you pay hundreds of dollars more each year.
A properly insulated attic ladder will create a thermal barrier between your living space and the attic above that is often too hot ot too cold. The tool can help prevent warm air from escaping in cold months and stop hot air from entering homes in summer. This guide walks you through how to insulate an attic ladder. This is a simple process to help you reduce energy costs and make your home more comfortable.
How To Insulate An Attic Ladder?
Before insulating your attic ladder, prepare a list of tools as below:
Basic Tools
- Measuring tape
- Utility knife
- Adhesive
- Scissors
- Staple gun
- Work gloves
- Safety glasses
Preparation
- Remove the attic cover from its packaging and lay it flat for 15-20 minutes. That gives time for the cover to return to its proper shape to fit properly over your attic opening.
- Use a degreaser to thoroughly clean the top of the ceiling joists and allow it to dry completely. Remove dust, grease, or debris that might interfere with adhesion. Then, wipe down the surface with a clean cloth to ensure the adhesive will bond lastly.
Installation Process
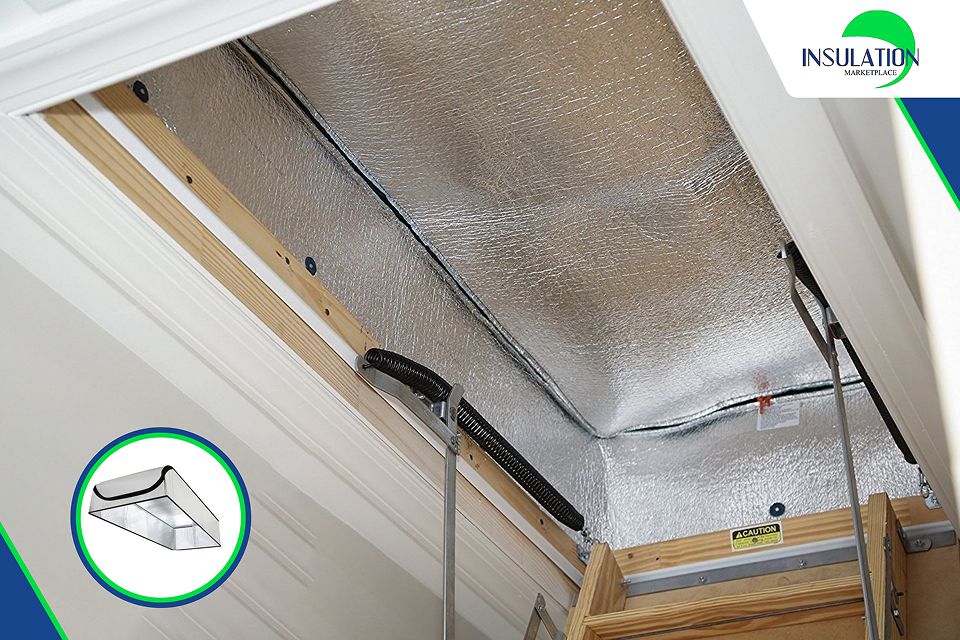
- Carry the attic cover up to your attic and place the side tabs directly on top of the ceiling joists or attic floor. Ensure the cover is centered over the opening and the zipper opens at the hinge end of the staircase. This placement makes it easy to enter or exit the attic.

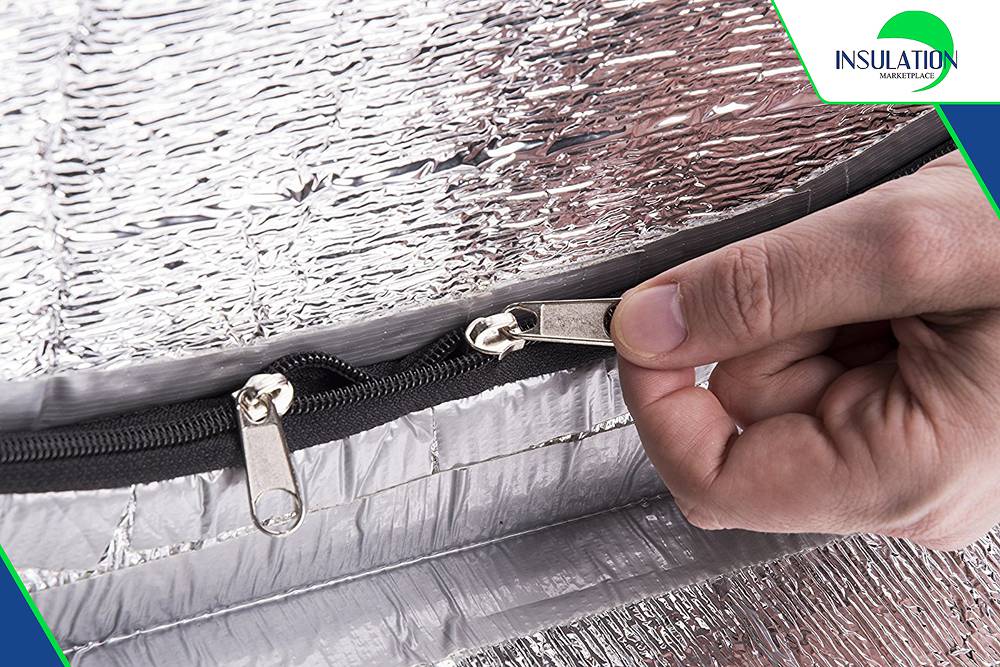
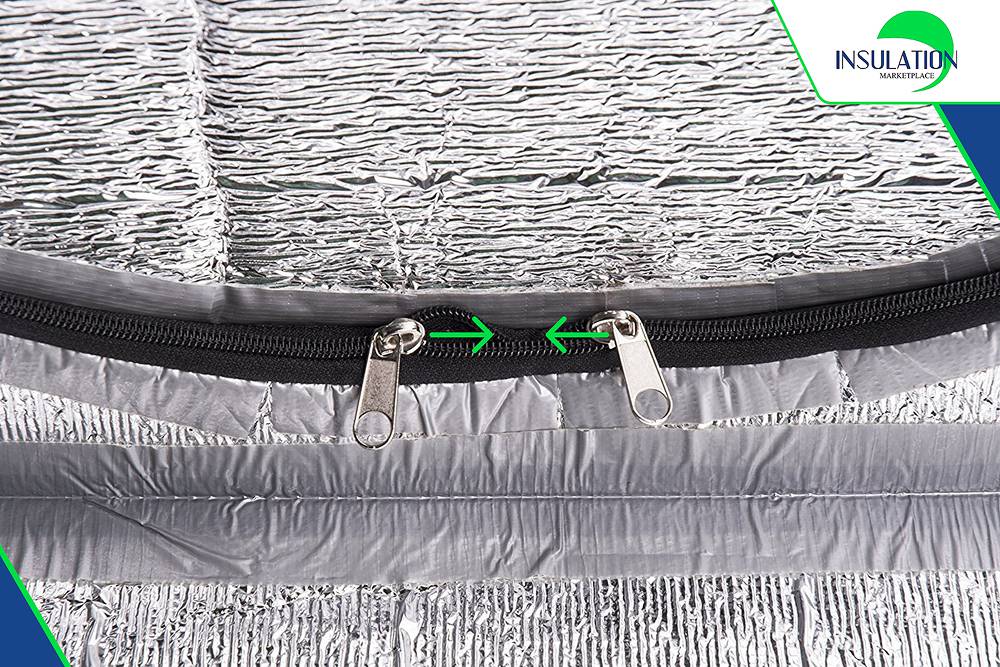
- Unzip the cover completely to open the flap. When you have full access to all sides and corners of the attic cover, it becomes easier to secure each section without gaps.
- Apply adhesive, starting at one corner and removing one adhesive tape strip at a time. Press firmly to stick each adhesive section to the ceiling joists and attic door frame. It is recommended to apply consistent pressure for 30 seconds on each section. Work methodically around the perimeter for a complete airtight seal.
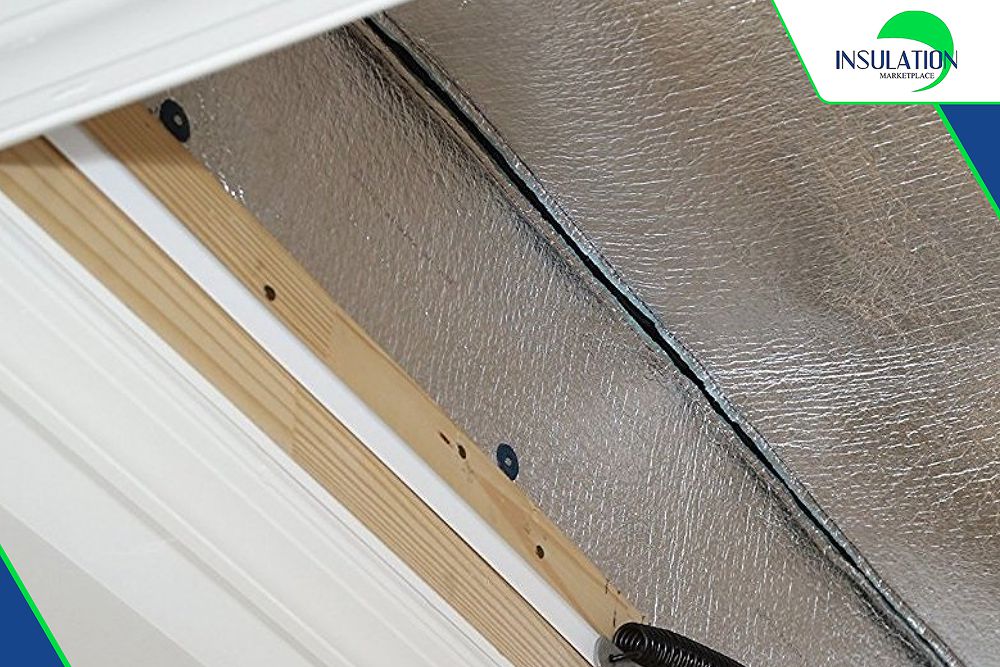
- To provide additional reinforcement beyond the adhesive, place staples every 4-6 inches along each tab where it meets the ceiling joists. These staples ensure the cover remains securely in place under frequent attic access.
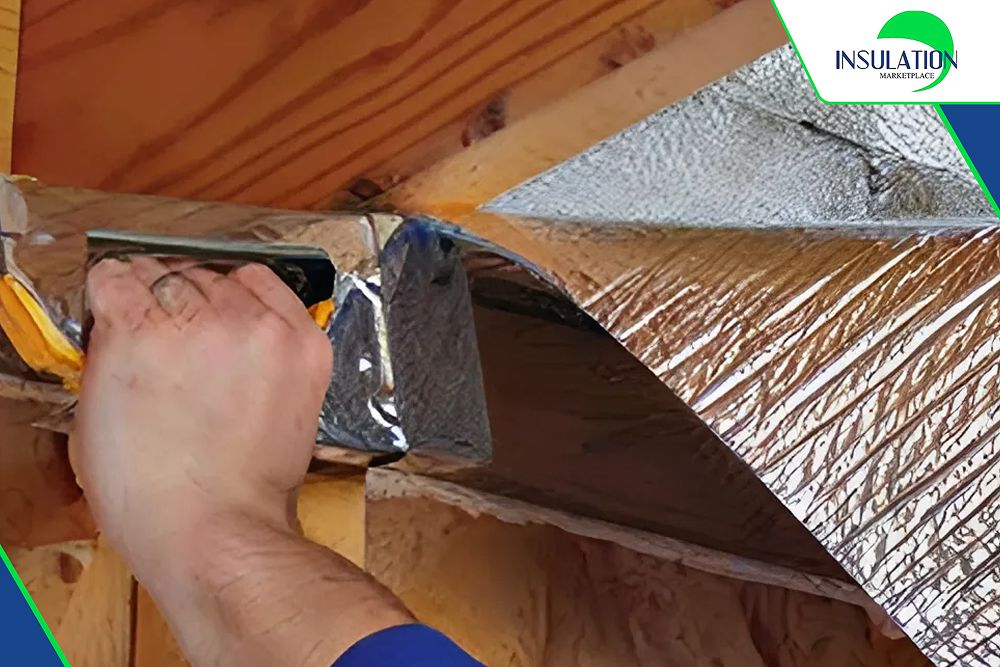
- Continue applying adhesive and staples until all sides are secured and all air leaks are addressed. Pay attention to corners and edges where gaps might occur. Then, test the seal by feeling to see if there is any air movement needed around the edges.

- Finally, close the zipper as you descend the stairs. Make sure the zipper closes smoothly to create a complete seal. It is important to always zip the cover closed after accessing your attic to maintain the thermal barrier.
Why Should You Insulate Your Attic?
If you are not ready yet, take a look at more reasons why you should not hesitate to insulate your attic!
- Enhance prevention capability
Proper attic insulation creates a robust defense system for your home. It blocks water vapor from seeping in and deteriorating walls, prevents mold growth from moisture accumulation, and protects shingles from heat-induced swelling and cracking. A well-insulated attic forms an effective barrier against ice dams, frozen pipes, and pest invasions.
- Optimize Investment
Approximately 25% of your home's heat escapes through an attic that is not insulated properly. Meanwhile, proper insulation can reduce monthly energy costs by 10-20%. You'll see a 5% less in electricity use and over 10% savings in natural gas consumption. During summer months, insulation traps cool air inside to effectively maintain comfort and efficiency. You will also avoid costly repairs for roof damage and pest infestations.
- Reduce Cost
The return on investment of attic cover installation can reach up to 116%. Beyond energy savings, insulation improves indoor air quality, reduces outdoor noise, extends roof lifespan, and delivers a smaller carbon footprint.
Considerations to Properly Insulate An Attic Ladder
Here's what you need to know before starting the process of insulating an attic ladder:
- Installing an attic ladder is manageable with two people.
- Make a comprehensive list of tools and insulation materials.
- Read the manufacturer's instructions to identify all required tools that are not provided in the kit.
- Proper loft hatch insulation plays a key role in the overall effectiveness.
- Work with a partner for safety and efficiency.
- Use all provided materials according to specifications.
- Ask for professional installation if you have any doubts about the DIY approach.
How to Choose an Insulated Attic Ladder
When selecting an insulated attic ladder, focus on the following key factors to make sure the insulation achieves the best efficiency:
- Choose a ladder with an effectively insulated door panel to prevent heat transfer between your attic and home.
- Select models with quality weatherstripping along the door panel edges. It creates an airtight seal when closed. This feature blocks drafts and prevents heat escape.
- Check the R-value - higher numbers mean better insulation performance. A higher R-value ladder will improve energy efficiency and cut heating and cooling costs.
- Verify the ladder's weight capacity supports both you and any items you'll carry to the attic.
- Pick a ladder that's simple to operate. It should allow for comfortable handles, smooth opening mechanisms, and non-slip steps.
Stay Comfortable Year-Round with SmartATTIC
Insulating your attic ladder is one of the simplest yet most effective ways to improve energy efficiency. Learn how to insulate an attic ladder to create a thermal barrier to prevent air leakage between your living space and attic. You can benefit from this minimal investment yet yield significant energy savings.
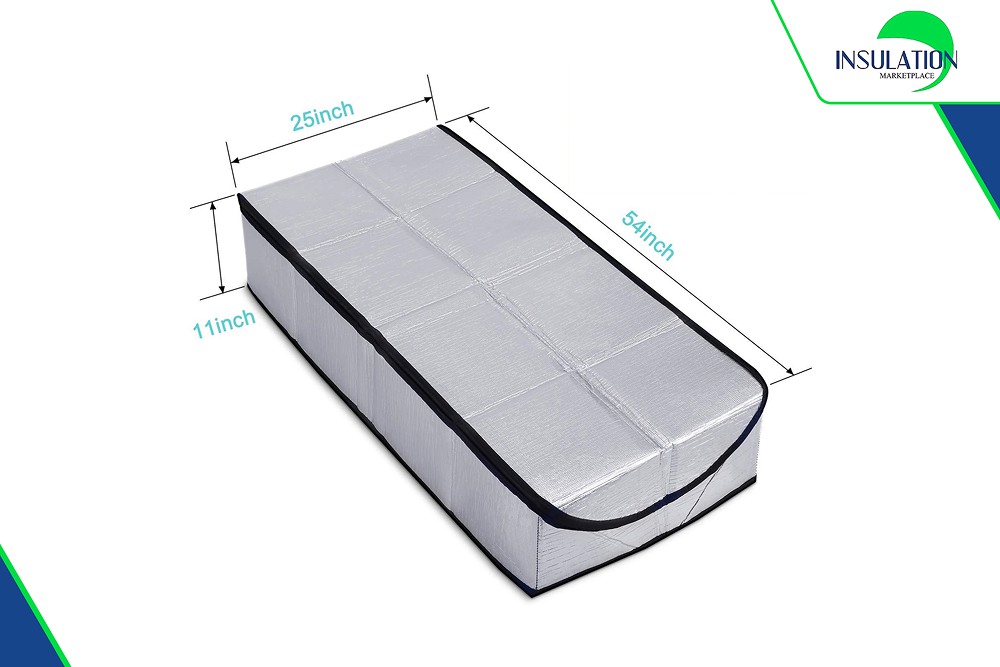
SmartATTIC insulation kit provides an easy, effective solution for your attic insulation. The product is available in two convenient sizes (25" x 54" x 11" and 30" x 60" x 11") to deliver impressive benefits. It improves HVAC efficiency with the impressive R-value of 15.67. There is no requirement for special tools during installation, while it has the Class "A" fire rating and is environmentally friendly, non-toxic, and non-carcinogenic. SmartATTIC will surely provide homeowners with a quick return on their investment within months.
Ready to stop wasting energy and money? Order your SmartATTIC insulation cover today and start enjoying the savings!